Graham Mayor
... helping to ease the lives of Microsoft Word users.
 |
 |
 |
Many people access the material from this web site daily. Most just take what they want and run. That's OK, provided they are not selling on the material as their own; however if your productivity gains from the material you have used, a donation from the money you have saved would help to ensure the continued availability of this resource. Click the appropriate button above to access PayPal.
Word cannot import PDF
Word has no filters to enable the import or opening of Adobe PDF format files. Acrobat and Reader from Version 7 allow single page PDF files to be inserted as objects, but as objects cannot span pages only the first page of multi-page PDF files will be displayed.
Owners of the full version of Acrobat would be able to save the PDF to a graphical format such as JPG.
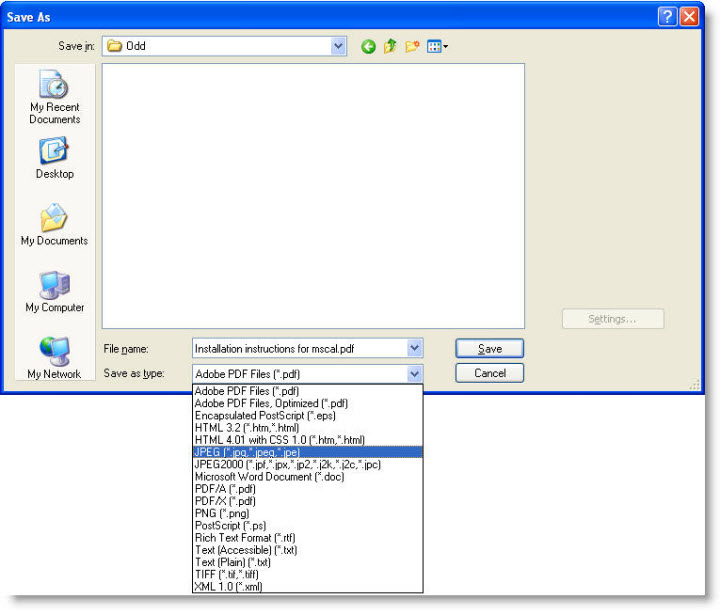
Others will require the purchase of additional software to achieve the same ends - in the following example, the excellent SnagIt from www.techsmith.com (which, incidentally, was used to produce all the screen images on this web site)
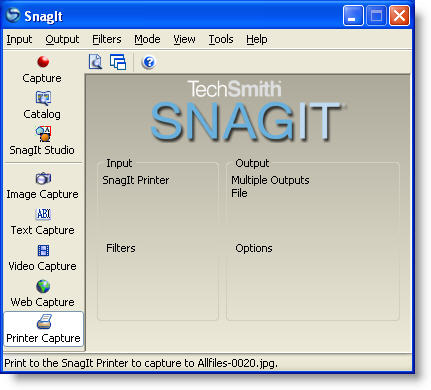
SnagIt includes a very convenient 'printer' driver which will output multi-page documents as separate graphics images - one for each page - in a variety of formats. This driver can be used with any application that you can print from, so the technique described below is not limited to Acrobat.
First get your image files.
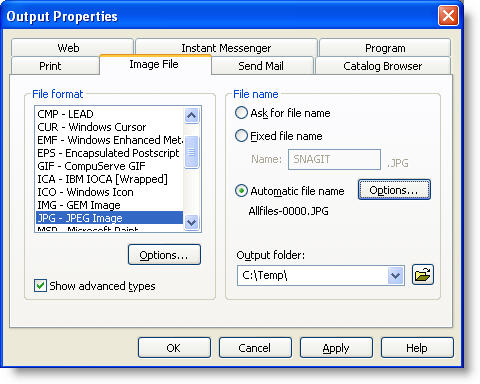
The first step is to setup the SnagIt driver to output to pre-named and numbered files in a folder of your choice. The following images are from SnagIt 7.2 in 'Classic' view, but other versions are essentially similar. Select 'Printer Capture' mode then 'Output > Properties' from the menus.
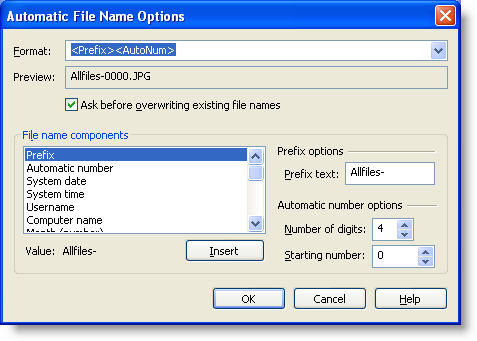
In the following sequence of screen shots, I have configured the output to save the files with the default name in a folder c:\temp, which we will be using in the macro later.
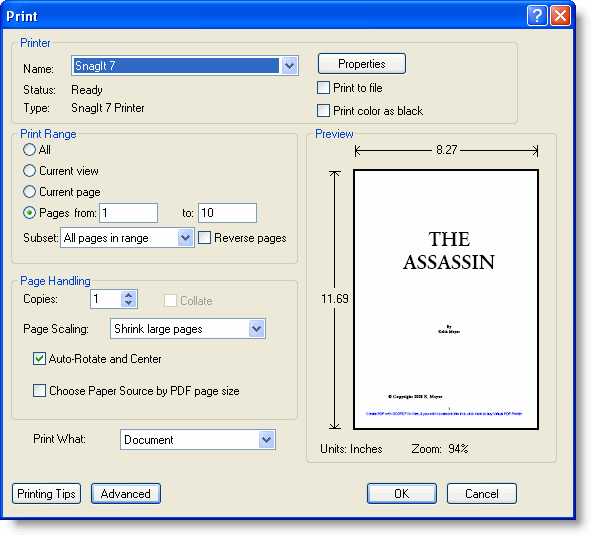
Using the print option from your application - here Adobe Acrobat 6 - print the document or parts of the document you wish to insert into Word.
This will produce a collection of numbered files in the chosen folder. It doesn't matter if there are other files in the folder.

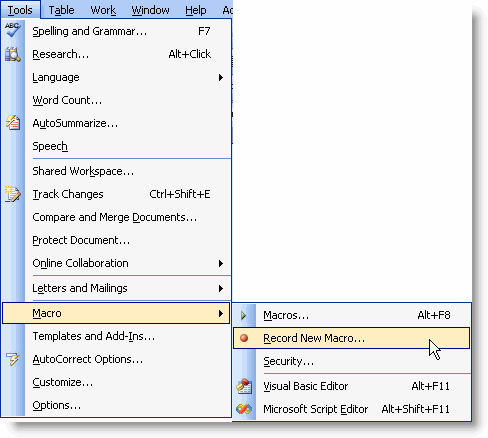
Create the macro.
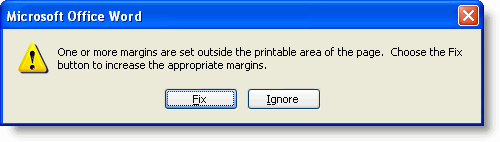
The page area that can be setup in Word is determined by the printer driver, so the first step is to establish the limits for the current printer driver. The easiest way to do this is to set all the margins at zero. When you OK this you'll get an error message. Select FIX and the limits are inserted in the dialog. To make things easier, record these steps in a macro as in the following sequence of illustrations
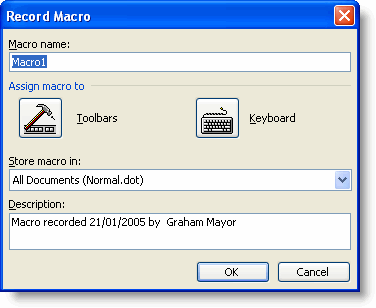
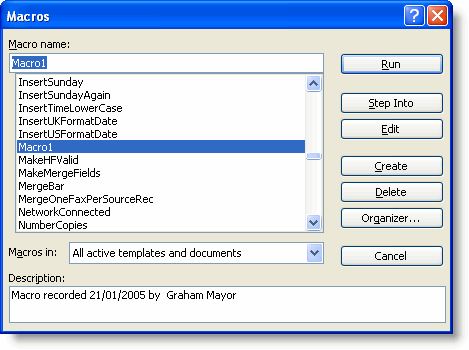
The macro name is irrelevant. We are only using it to gather the settings, so you can delete it later. For now, accept the default offered.
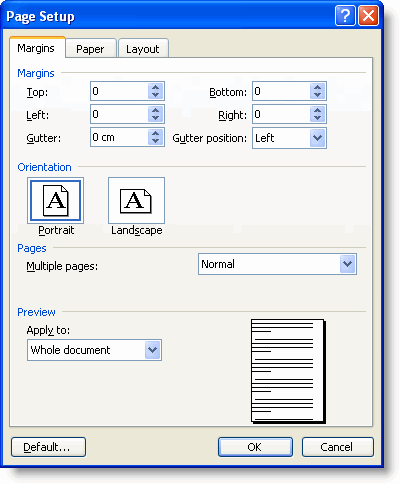
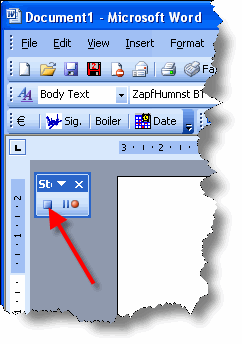
With the recorder running set up the page layout with zero margins as below and click OK. Then force Word to fix the error and finally stop the macro recorder.
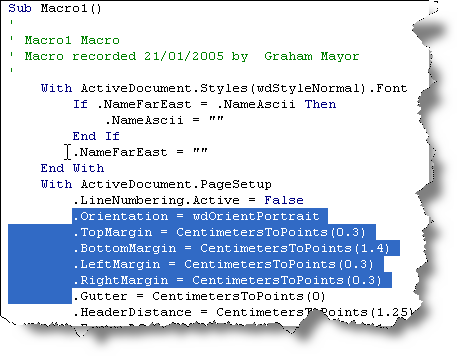
Edit the macro you have just recorded. Highlight the section indicated and copy to the clipboard.
Move the cursor to the end (CTRL+End) and paste the following code at the cursor:
Sub InsertImages()
Dim Count, SFileNo, SFile
Selection.InsertBreak Type:=wdSectionBreakNextPage
With Selection.PageSetup
.Orientation = wdOrientPortrait
.TopMargin = CentimetersToPoints(0.3)
.BottomMargin = CentimetersToPoints(1.4)
.LeftMargin = CentimetersToPoints(0.3)
.RightMargin = CentimetersToPoints(0.3)
End With
Count = 0
Do
On Error GoTo oops
SFileNo = Right("000" & Count, 4)
SFile = "C:\Temp\Allfiles-" & SFileNo & ".jpg"
Selection.InlineShapes.AddPicture FileName:=SFile
Count = Count + 1
Loop
oops:
End Sub
Select the matching block (coloured red in the listing for clarity) then CTRL+V to paste the clipboard content over the selected block, thus inserting your personal settings in the macro.
You can attach the macro to a toolbar button, but as this is unlikely to be something you need to do too often, it is probably more sensible to run it from the macros dialog (Alt+F8) when required. Running the macro will insert the graphics files, in the correct order into the Word document, each on a new page.
For more information about installing macros from code listings and adding them to toolbars, use this link
Adobe PDF
Word does not open PDF format files. For that you need Adobe Reader or one of the alternative clones.