Graham Mayor
... helping to ease the lives of Microsoft Word users.
 |
 |
 |
Many people access the material from this web site daily. Most just take what they want and run. That's OK, provided they are not selling on the material as their own; however if your productivity gains from the material you have used, a donation from the money you have saved would help to ensure the continued availability of this resource. Click the appropriate button above to access PayPal.
Idiots' guide to installing macros
Elsewhere in this web site, and in the Microsoft Word newsgroups you may be offered macro listings. Here is a simple guide to installing such listings as macros in Word.
While the illustrations may have been
updated at various times and thus may be from different Word and
Windows versions, the procedures and dialogs involved are
virtually identical for all
Word versions.
The VBA editor is similar in all Office products that feature
VBA programming.
Let's use a useful macro to update all the fields in the document as an example. The listing is as follows:
Dim oStory As Range
For Each oStory In ActiveDocument.StoryRanges
oStory.Fields.Update
If oStory.StoryType <> wdMainTextStory Then
While Not (oStory.NextStoryRange Is Nothing)
Set oStory = oStory.NextStoryRange
oStory.Fields.Update
Wend
End If
Next oStory
lbl_Exit:
Set oStory = Nothing
Exit Sub
End Sub
Word 2000-2003
1. In Word 2000-2003, select Tools > Macro > Macros
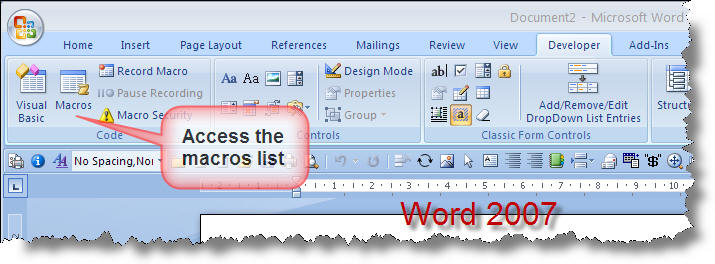
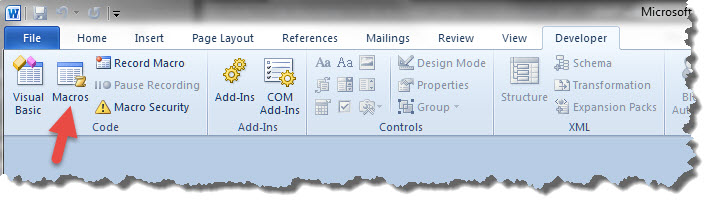
Word 2007
In Word 2007, access to the macro dialogs has been changed and as installed is not available.
To make it available, it is necessary to first add the 'Developer' tab to the
Ribbon. To do this,
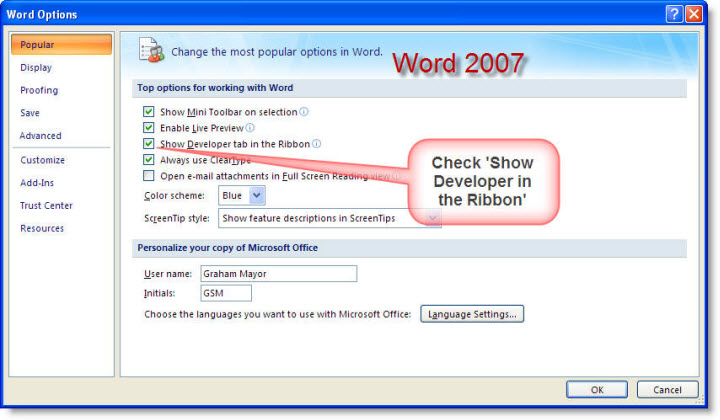
Click the Microsoft Office Button. That's the one that looks like a pizza.

Then select 'Word Options'
Click 'Popular', and then select the 'Show Developer tab in the Ribbon' check box.
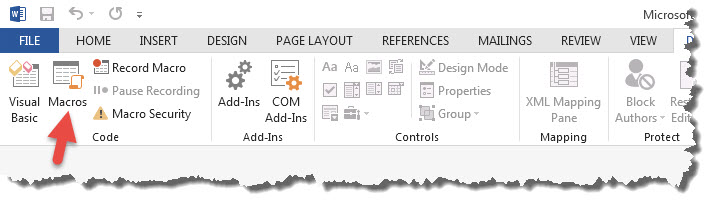
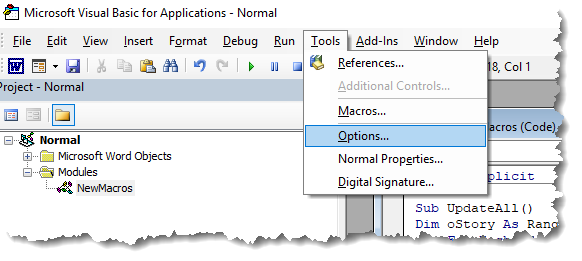
Word 2010 onwards
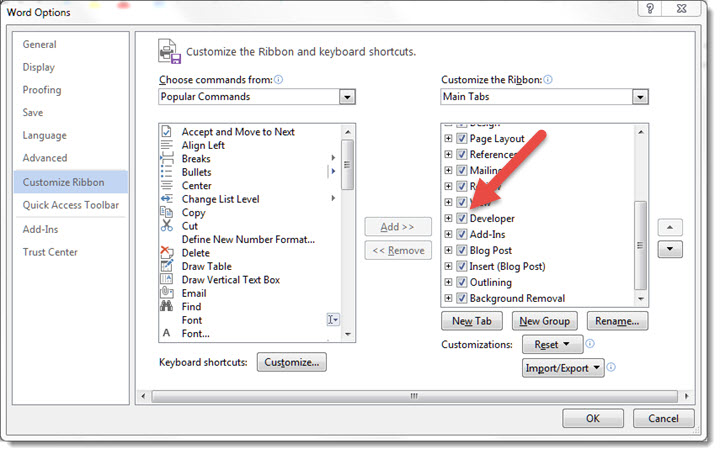
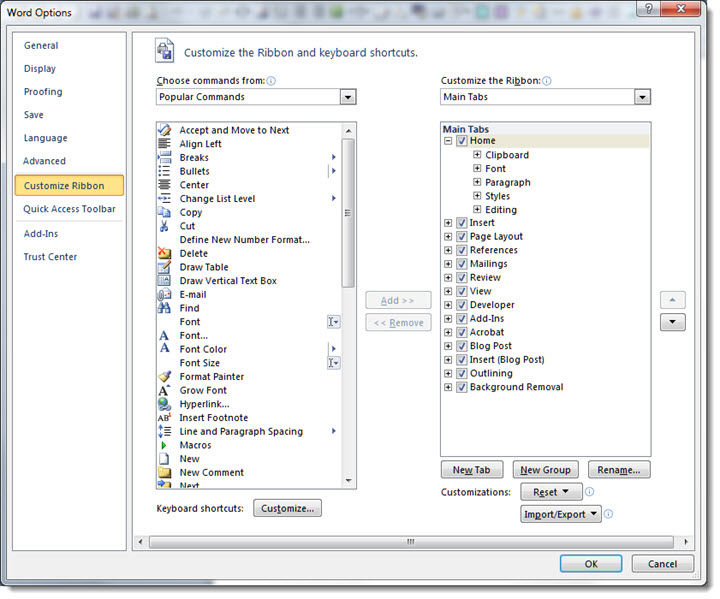
For Word 2010 onwards, the 'Developer' tab should already be shown by default, but if not, it is accessed via its the integral ribbon editor. In these applications the ribbon editor is available from File > Options > Customize Ribbon.
In addition to the described approaches listed above, in all recent Word versions ALT+F8 will give access to the macro selector dialog and the macro dialog may also be located on the View tab of the ribbon.
The illustration below is from Word 2016. Earlier Word version dialogs are almost identical and have exactly the same functions.
When you first open this dialog, and assuming that you have no add-ins installed, and there are no macros in the current document, the dialog will be empty as shown below:
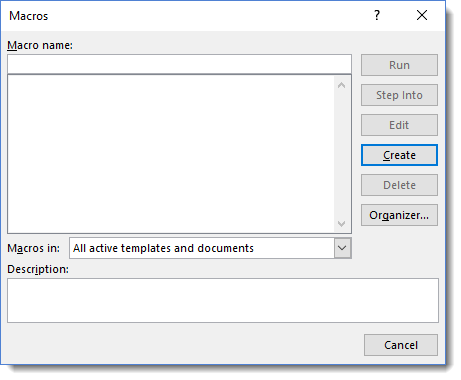
Type the Name of the macro into the Macro Name i.e. the bit after Sub and before () here UpdateAll - (no spaces in the name!) box.

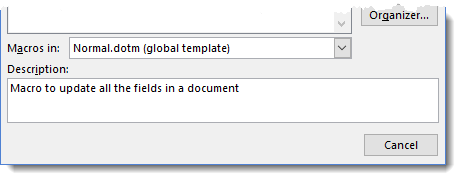
2. In the field directly beneath the macro names list box, pick which template or document you wish the macro to be saved in.
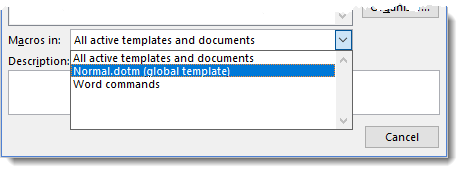
For a template or document to be listed, it must first be opened in Word.
If you select 'All active templates and documents' - the macro will be saved in the Normal template, which for Word versions up to 2003 is Normal.dot, and for Word from version 2007, it is Normal.dotm.
3. Add or edit the description, if you wish, then click 'Create'.
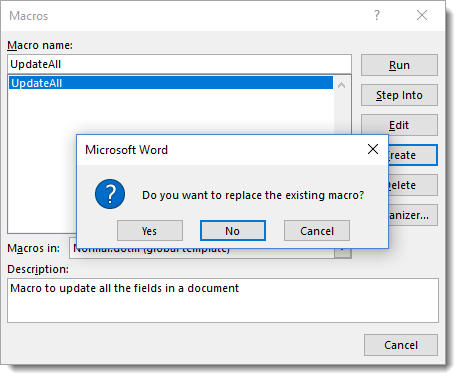
If you have entered or selected a name that already exists in the active template, you will get a warning message:
If creating a new macro, change the macro name to a unique name.
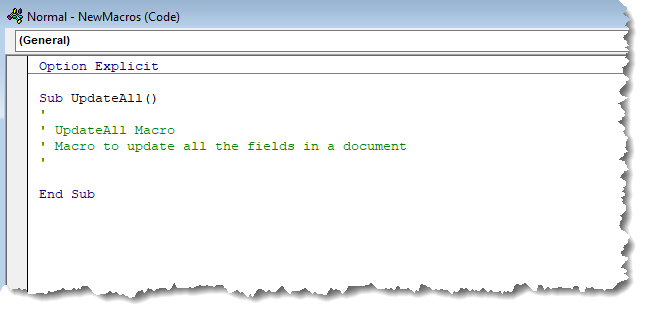
4. The macro editor will open at the correct place. There will be an entry as follows.
The default descriptive wording shown in green will vary between versions, and includes the text in the 'Description' field of the Macros dialog box.
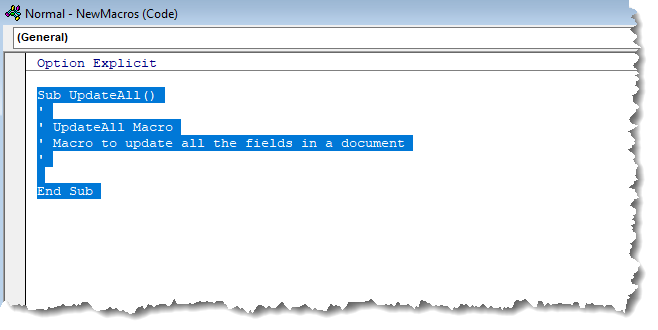
5. Copy the complete block of code from the forum message to the clipboard
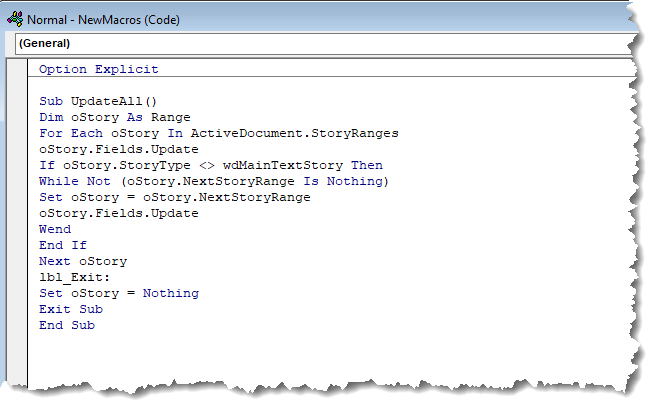
6. Switch to the macro editor window. Select all the above listed block from Sub to End Sub inclusive. Do not select anything above Sub, such as Option Explicit as shown here.
And paste the clipboard contents over the selected text to give the following.
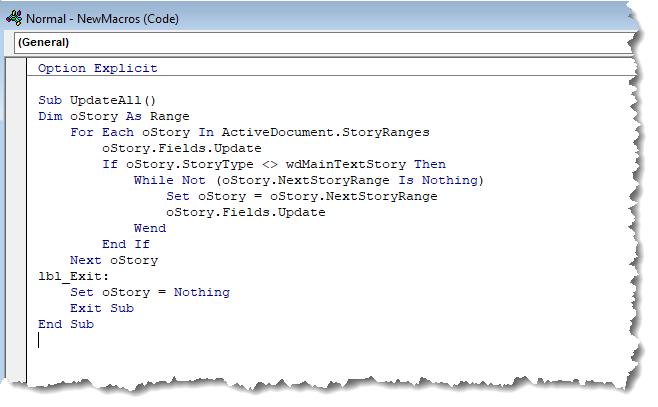
You can tab the code to make it easier to follow if you wish, as shown below, but it is not strictly necessary for the purposes of this example.
If any lines are highlighted in red, this is usually an indication that the line in question has broken prematurely - as a result of e-mail editor line wrapping e.g.
Move to the start of the following line and backspace to join that line to the end of the red highlighted line as shown below.

Some listings do not include the Sub ... End Sub lines. In this case, give the macro a useful descriptive name at (1) above and paste the code between the Sub and End Sub lines.
7. Click the 'Save' icon on the VBA editor toolbar and close the editor.
Modules
Word's VBA editor files macros by project. In this case the project is Normal (i.e. the Normal template). Projects are sub-divided into Word Objects, Modules and Forms. By default, macros are stored in the Normal project in a module called NewMacros. Although it is not essential at this level, Modules make macros much simpler to handle, so it is good practice to separate macros you create into Modules.
If they are not already displayed, from the VBA editor view menu, display the Projects and the properties Windows.
From the Insert Menu select 'Module'.
This will create a new module in the normal project called Module1
From the Properties window rename the module to something more meaningful - here UpdateAll
Then cut and paste the macro from the NewMacros module to the newly created Module1.
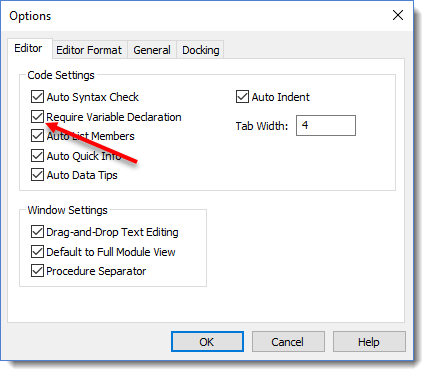
Although macros will work without specifically declaring the variables used, it is good practice to declare all the variables used in your macros. To force you to do so, you can use the command
Option Explicit
at the start of each module, as shown in the above illustration. You can set an option in the VBA editor to insert this line automatically when you create a new module
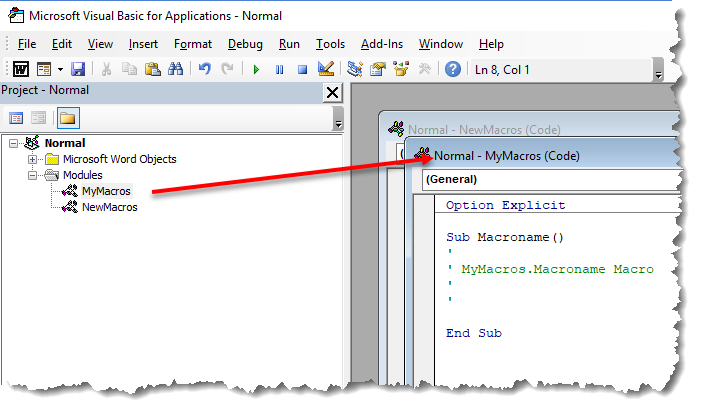
Shortcut Tip: When creating a new macro via the Macros dialog, you can dictate which module to save the macro in (or create a new module) by adding the module name as a prefix to the macroname, separated with a full stop (period) as in the following illustrations. Here the macro name is 'MacroName' and the module name is 'MyMacros':

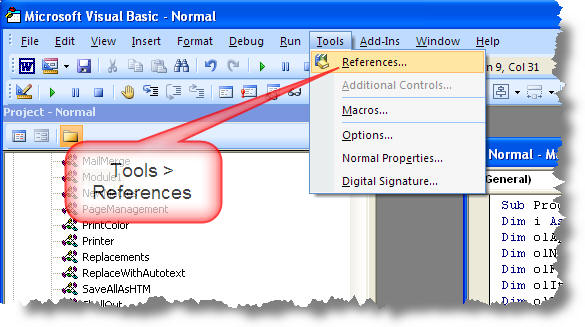
Adding References to Other Applications
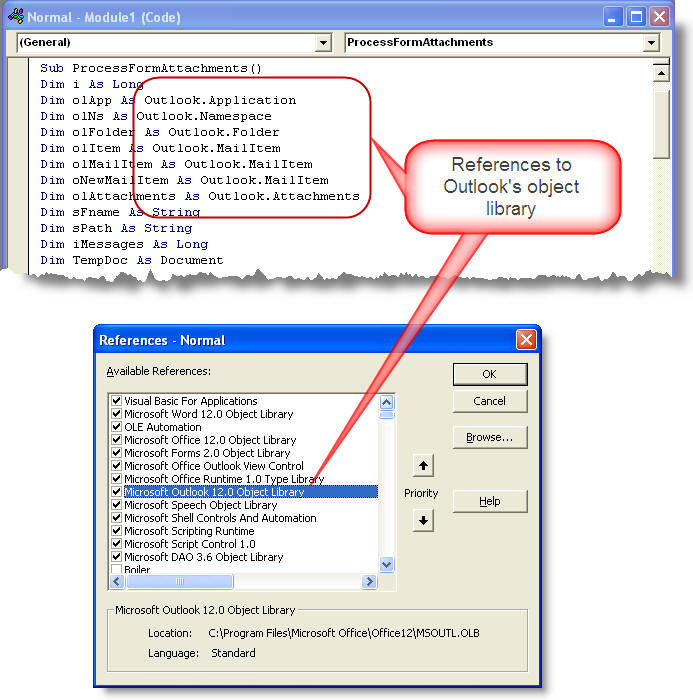
Some macros may call procedures from other applications. You may wish to access (say) Outlook or Access objects from within a Word macro. There are some macros on this site that require the addition of a reference to Outlook's object library. Such references may be added from the Tools > References menu of theVBA editor, and the process is identical for all Word versions - though the range of available references will be different.
Where calls are made to pre-declared references, this is referred to as 'Early Binding'. It is also possible to declare such items as Objects and not add the reference to the object library. This is known as 'Late Binding'. There are advantages and disadvantages to both approaches, but for macros to be used on your own PC, especially while learning to use VBA, I would stick with Early Binding.
For a discussion of the two systems, see https://support.microsoft.com/kb/245115.
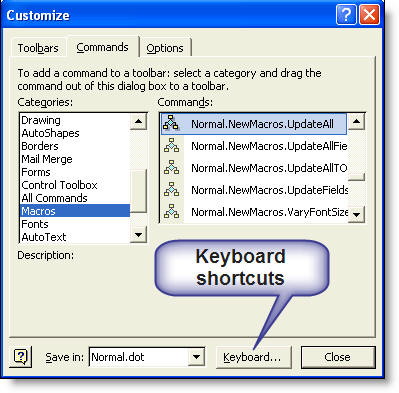
Add the Macro to a toolbar (Word 2000-2003).
From Word's document screen, right click on the toolbar area and select 'Customize' (or pick Customize from the Tools menu) then from the command list left window select macros.
In the right window pick your newly created macro with the left mouse button and drag it to your toolbar and drop it where you would like it to appear. (Or drop it in an appropriate menu if you prefer).
In the illustration below the macro has not been moved from the NewMacros module. If you are going to move the macro to its own module, ensure that you do so before attaching it to a toolbar button.
You can create personal toolbars from this dialog. I strongly recommend creating personal toolbars to hold your personal tool groups.
Right click on the entry and edit the name to something sensible - for a toolbar button use an abbreviation and/or add a suitable icon
Close the 'customize' wizard and the macro will be available to your documents.
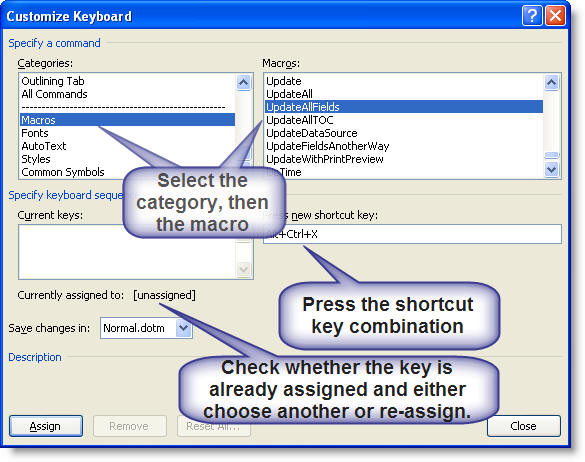
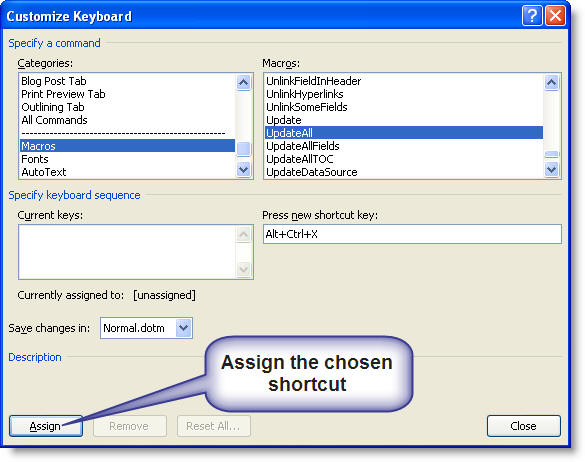
Add a keyboard shortcut?
Open the customize dialog (see previous section).
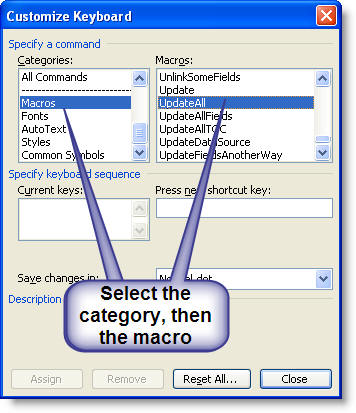
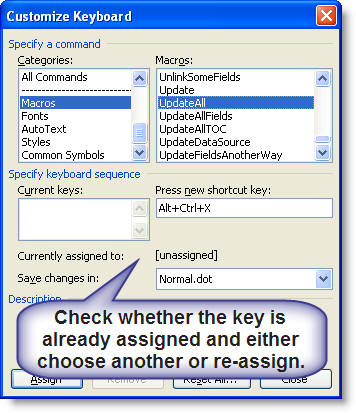
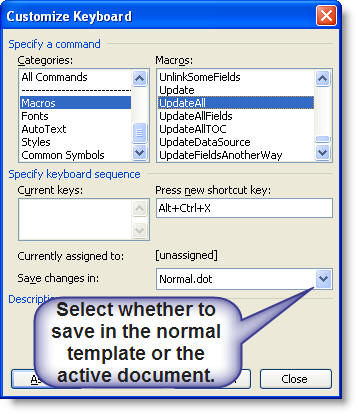
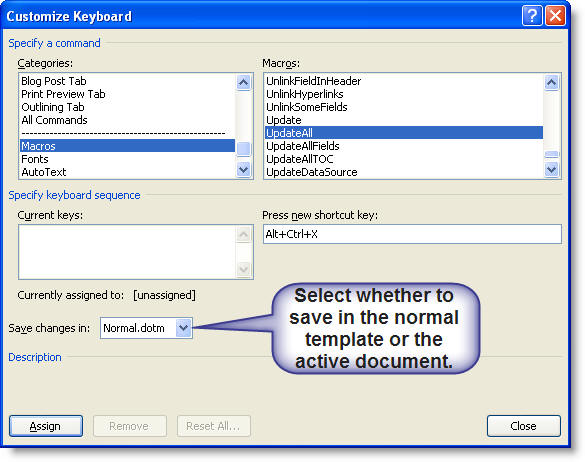
Shortcuts saved in the normal template will be available to all documents. Shortcuts saved in the active document will be available only to that document.
Add Macro to the Quick Access Toolbar (Word 2007/2016)
Word 2007 and above allow regularly used macros to be added to the Quick Access Toolbar (QAT). Right click the QAT and select 'Customize Quick Access Toolbar'
At the next dialog, select 'Macros'.
Word 2010 onwards
Word 2010 and later additionally provide the option to add a macro to a ribbon button (It would also be possible to add the button to the ribbon in Word 2007 also, but that requires a more in depth knowledge of XML programming. If you wish to pursue that option, see https://gregmaxey.com/word_tip_pages/customize_ribbon_main.html)
The Word 2010/2016 ribbon editor is accessed from File > Options > Customize Ribbon. The principles involved are similar to those of editing the QAT (Quick Access Toolbar), but here you have more flexibility. My suggestion would be to add a new tab to the ribbon to provide your macro commands.
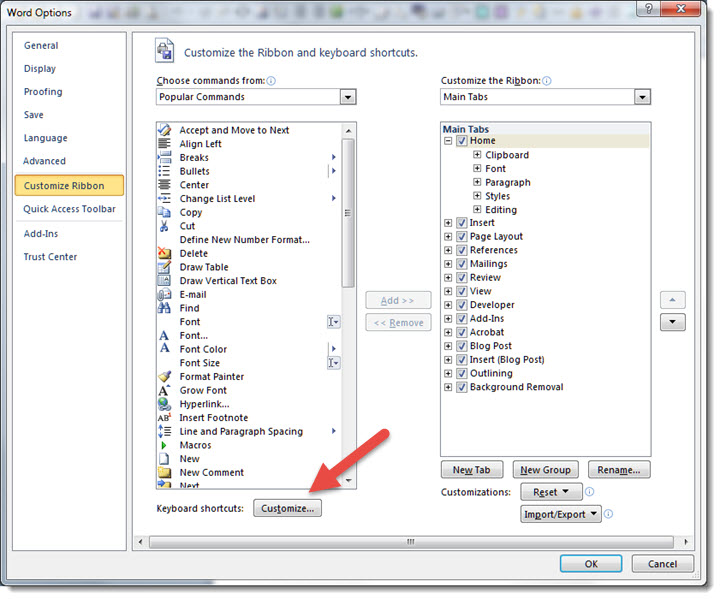
Add a keyboard shortcut?
Keyboard shortcuts may be used in addition to, or instead of, QAT (Quick Access Toolbar) commands.
From the same dialog, click the 'Customize' button as shown.
Shortcuts saved in the normal template will be available to all documents. Shortcuts saved in the active document will be available only to that document.
Auto... macros
Macros usually have to be called in order to run, but there are macros that run automatically when certain events present themselves. These are called auto macros:
AutoExec - runs when Word is started (from the start menu or desktop shortcut) or a global template is loaded.
AutoNew - runs on creating a new document.
AutoOpen - runs on opening an existing document.
AutoClose - runs when a document is closed.
AutoExit - runs on closing Word or unloading a global template.
These are well documented in Word's VBA help, so I don't propose to elaborate on what is written there. I will simply show a couple of examples.
Word 2003 in particular seems prone to losing at least some of its user settings at random, and so you can use auto macros to force the preferred conditions. The following are taken from my own laptop for Word 2003.
ActiveWindow.ActivePane.DisplayRulers = True
'display the rulers
ActiveWindow.ActivePane.View.ShowAll = False
'turn off the formatting command view
With ActiveWindow.View
.Type = wdPrintView
'select page/print layout view
'Alternative to the above line if normal view is preferred
'.Type = wdNormalView
.Zoom.Percentage = 500 'fix the tiny cursor error
.Zoom.Percentage = 100
'set the display zoom to 100%
.FieldShading = wdFieldShadingWhenSelected 'set the field shading preference
.ShowFieldCodes = False
'turn off field code display
.DisplayPageBoundaries = True
'Turn on white space between pages
End With
CommandBars("Reviewing").Visible = False
'Turn off the reviewing toolbar (Word 2003)
lbl_Exit:
Exit Sub
End Sub
Sub AutoOpen()
'Display filename and path in window title bar
ActiveWindow.Caption = ActiveDocument.FullName
'The remaining settings are the same as for autonew
ActiveWindow.ActivePane.DisplayRulers = True
ActiveWindow.ActivePane.View.ShowAll = False
With ActiveWindow.View
.Type = wdPrintView
.Zoom.Percentage = 500 'fix the tiny cursor error
.Zoom.Percentage = 100
'set preferred zoom
.FieldShading = wdFieldShadingWhenSelected
.ShowFieldCodes = False
.DisplayPageBoundaries = True
End With
lbl_Exit:
Exit Sub
End Sub
Sub AutoExec()
CommandBars("Reviewing").Visible = False
'Here after a short delay another macro is run
'This forces off the display of formatting commands
'It may be necessary to increase the delay for a particular PC.
Application.OnTime _
When:=Now + TimeValue("00:00:01"), Name:="CodesOff"
lbl_Exit:
Exit Sub
End Sub
Sub CodesOff()
'This macro is called from AutoExec
On Error GoTo Oops
ActiveWindow.ActivePane.View.ShowAll = False
Oops:
lbl_Exit:
Exit Sub
End Sub
You will find more macro examples on the VBA Macro Examples page