Graham Mayor
... helping to ease the lives of Microsoft Word users.
 |
 |
 |
Many people access the material from this web site daily. Most just take what they want and run. That's OK, provided they are not selling on the material as their own; however if your productivity gains from the material you have used, a donation from the money you have saved would help to ensure the continued availability of this resource. Click the appropriate button above to access PayPal.
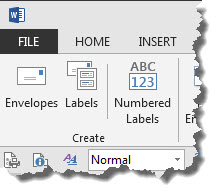
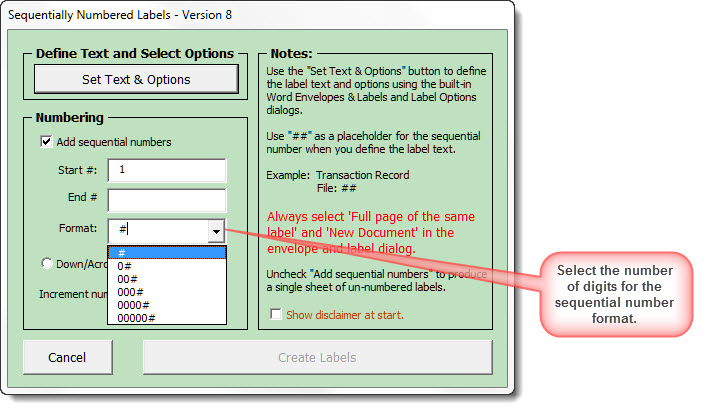
Sequentially Numbered Labels
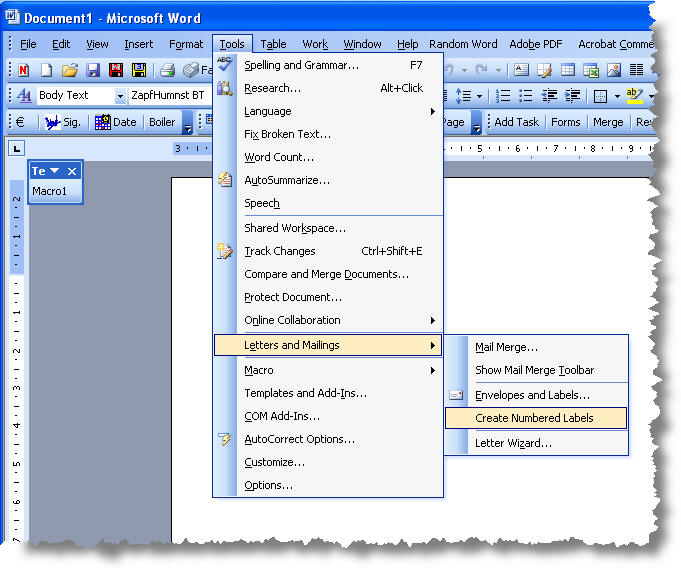
It is a frequent requirement to produce labels bearing incrementing numbers. There are several ways of doing this as illustrated below, but in a collaborative effort with my American friend Greg Maxey my first offering is a pair of add-ins for Word 2007/2016 and 2003. The two versions are identical in operation - indeed the code they contain is virtually identical, but the 2007/2016 version is saved as a DOTM format template to allow it to store a ribbon control. The Word 2003 version, which should also work with Word XP (and possibly Word 2000) adds a command to the Word menu bar.
The zip file contains both versions identified by 2007 and 2003 in the file name.
There is an alternative, and more recent add-in available from this site at Numbered Labels, which employs a different process to the one featured below and which should be easier to use.
Extract and run the installer from the zip file to install the add-in and remove any earlier version.
or for Word 2003
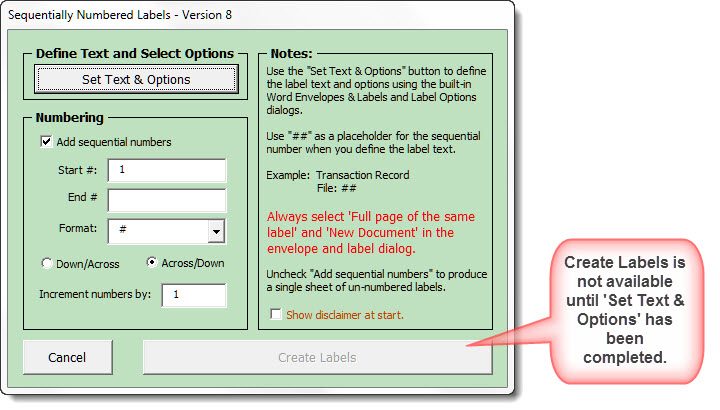
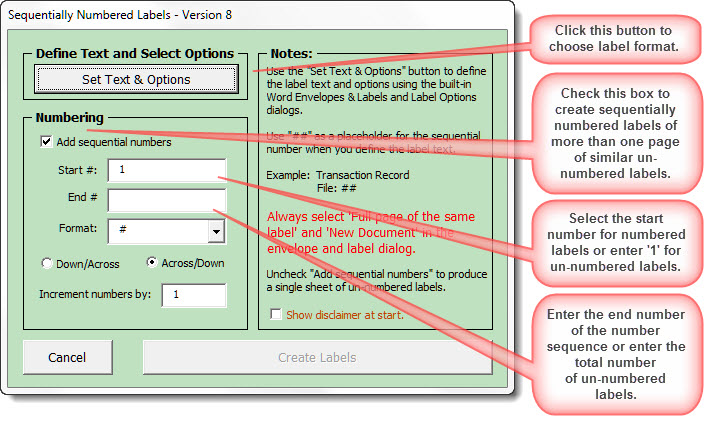
The following illustrations are from the updated version for Word 2007-13. The Word 2003 version has similar functionality but features the older dialog.
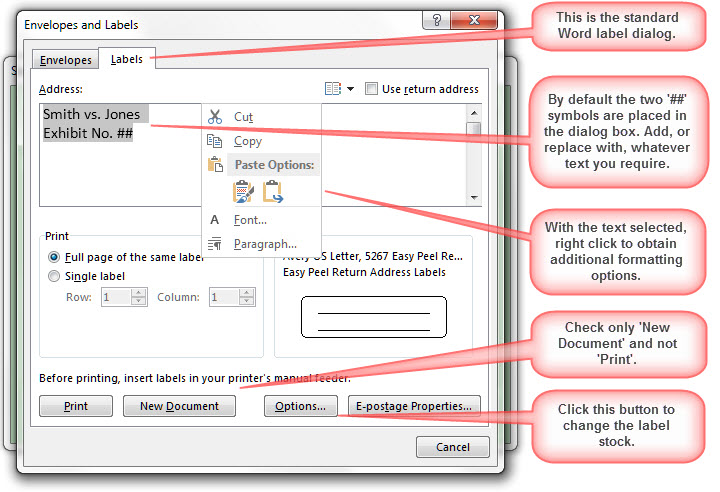
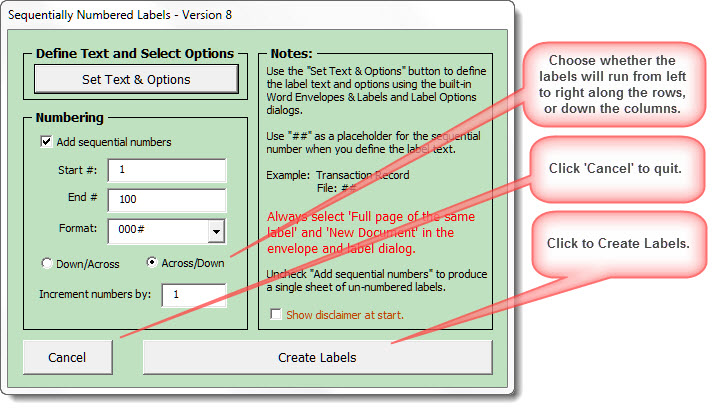

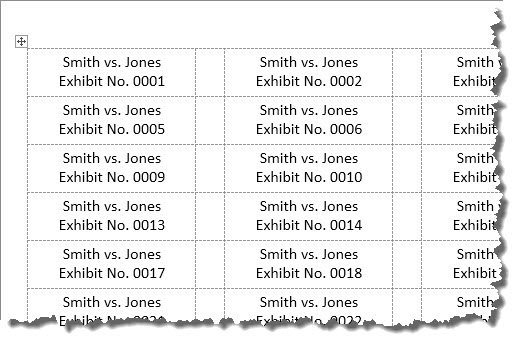
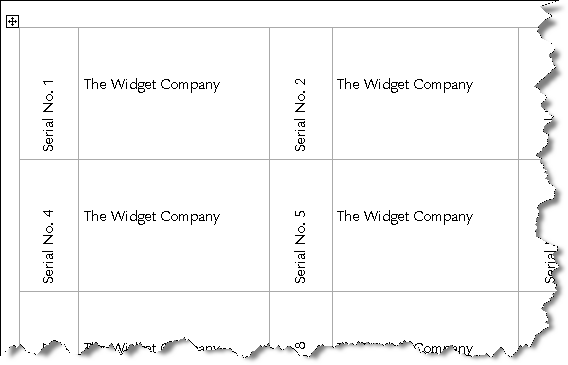
The labels are then produced. If the default Across/Down option is selected the layout will be:
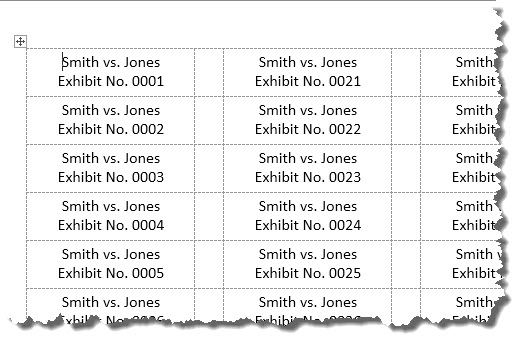
or if the Down/Across option is selected:
 -
Click here to download the add-in
-
Click here to download the add-in
See also the alternative add-in at Number Labels, that employs a different process using separate label templates (a selection of which is included, along with instructions for creating others).
Plan B - Macro solution
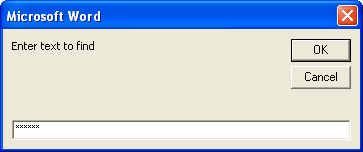
The following method was also inspired by Greg Maxey and entails using a marker in the merge document - here I have used a sequence of six asterisks, but any unique sequence should work - and then running the macro listed to convert the marker to a sequence of numbers. You can combine the numbers with letters inserted directly into the label and can start from any number. Here the numbers are limited to three digits but that can be altered in the macro.

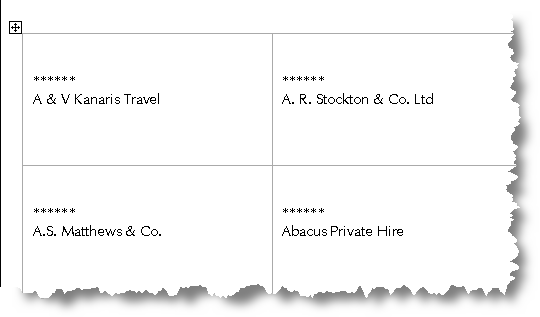
Add your choice of data fields and any fixed text before or after the number and merge to a new document.
When merged, the result should be something like that shown below:
Next select the macro and run it.
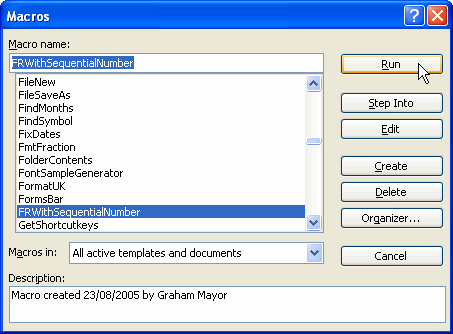
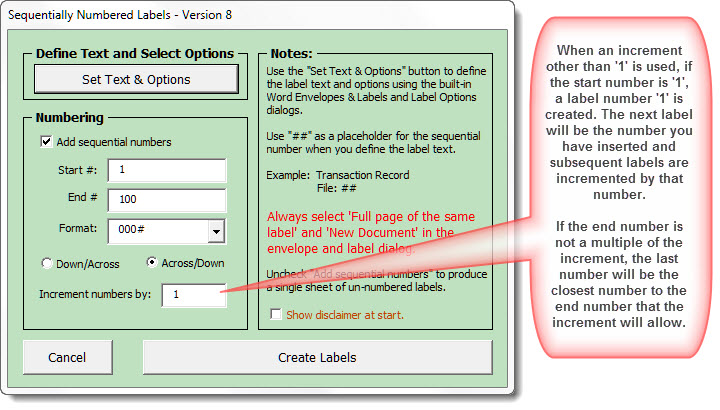
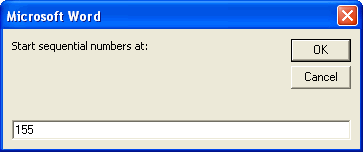
The default prompts are for the numbers to start at 1 and the six asterisks. You can change these in the dialog as required - Here I have changed the start number to 155:

The Macro
'Finds a specified text string
'and replaces with a sequential number
'Macro created 22 August 2005 by Greg Maxey,
' with modifications by G. Mayor
Dim findText As String
Dim startNum As String
Dim myRange As Range
Set myRange = ActiveDocument.Range
'define default number - here 1
startNum = InputBox("Start sequential numbers at:", , 1)
'define default search string - here six asterisks
findText = InputBox("Enter text to find", , "******")
With myRange.Find
.Text = findText
.MatchWholeWord = True
While .Execute
'define number of digits - here three
myRange.Text = Format(startNum, "000")
startNum = startNum + 1
myRange.Collapse direction:=wdCollapseEnd
Wend
End With
End Sub
Plan C - Excel data file
This method is better suited to labels on which only the number itself changes, such as tickets, serial numbers etc.
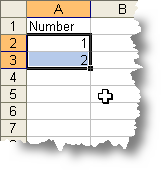
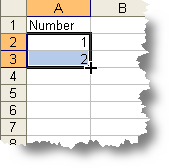
Excel makes the production of a data file simplicity itself. In cell A1, give the first column a title. In cell A2 enter 1. In cell A3 enter 2.
Select cells A2 and A3. This will 'highlight' the cells as shown in the first illustration.
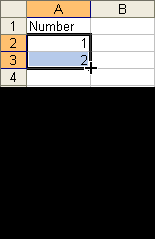
Hover the mouse by the bottom right handle of the selected cells, and the cursor will change to a '+' , as shown in the second illustration.
Right click and drag the bottom right corner handle down until you have as many numbers as you require.
Save the worksheet.
You can re-start the process from the next required number when you need another batch of uniquely numbered labels.
Create a merge document
Create a merge document to mailing labels (see Mailmerge Labels) and attach the data file that you have just created. Insert the merge field and any supplementary text you require and merge to a new document or the printer.

Vertical number orientation with horizontal text.

Sometimes there may be a preference for a number to read up or down i.e. at 90° to the body of the label. This can be achieved, but is rather fiddly, and you may wish to consider it as a two stage process - first the numbers, then the text. Or you could adapt the method described in Graphics on Labels only this time, the 'graphic' is the fixed text.
However, if you are not deterred, the split cell method is perhaps the most logical, and most frustrating to achieve if you do not follow a strict order of assembly as described below.
Begin with a standard label merge as in the previous example - see Mail Merge Labels with Word XP and display the field content (ALT+F9)
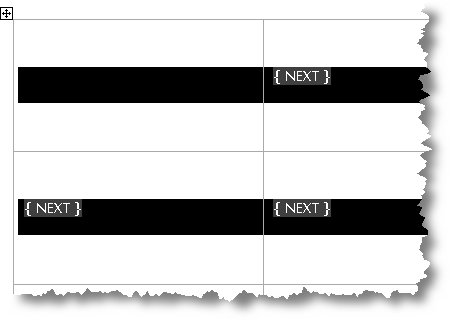
You will note that such a mail merge inserts a {NEXT} field into each cell but the first. You can ignore these for the moment.
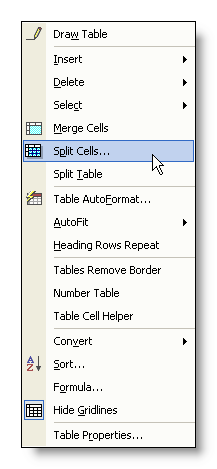
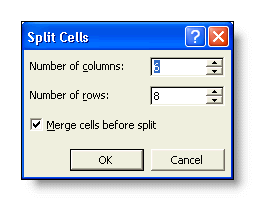
Select each column and from the table menu, select 'split cells' and split the table into two columns for each original of the original columns.
You will notice that the {NEXT} fields get screwed up, which is why we displayed them in the first place.
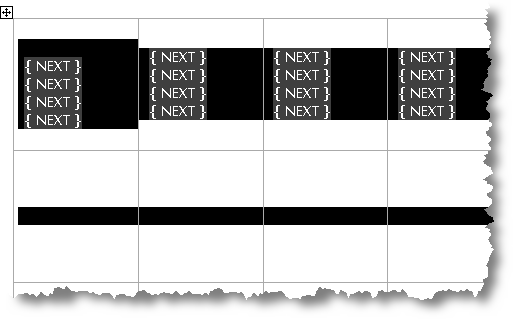
Delete all the {NEXT} fields.

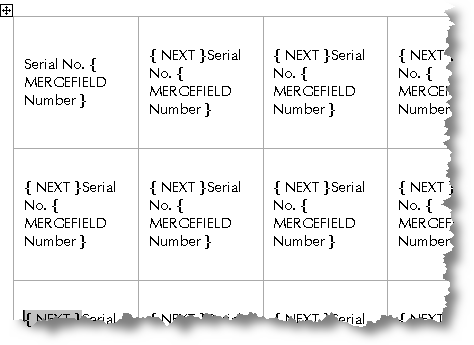
Enter the serial number merge field from the Excel data file, as in the previous example in the first cell.

Propagate the content to all the cells. This will replace the {NEXT} fields, but will also produce a host of redundant data in the alternate columns.
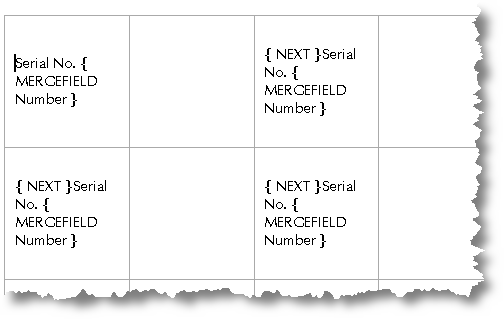
From the merge toolbar, change the document type to Form Letter (Letters) so that Word will not try to repopulate the cells. Propagate will no longer function.
Select and delete the content from the additional cells:
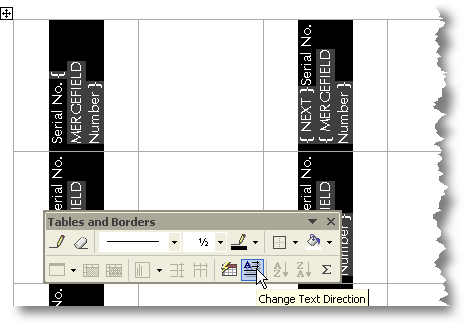
Select the remaining cells and rotate their content using the tool from the tables toolbar.
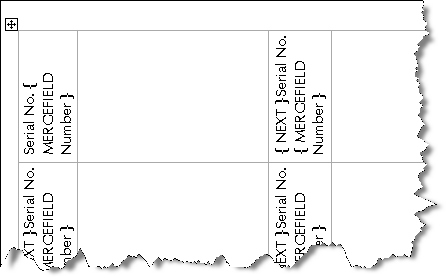
Drag the right column borders of the left cells of each column pair to accommodate the fields. Note that because the field display occupies more space than the eventual merged numbers, the resulting merge will occupy only one line. Thus you can make the columns narrower than in the illustration, apparently losing some of the content, without it causing a problem in the eventual merge. I have left all three lines showing for the purpose of clarity.
So much for the numbers. The next step is to add the fixed text.
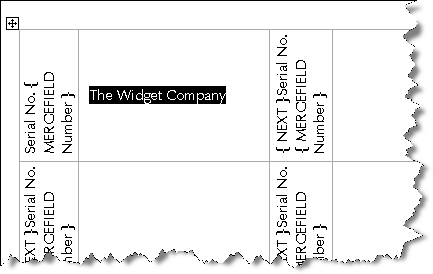
Enter the fixed text in the first empty cell.
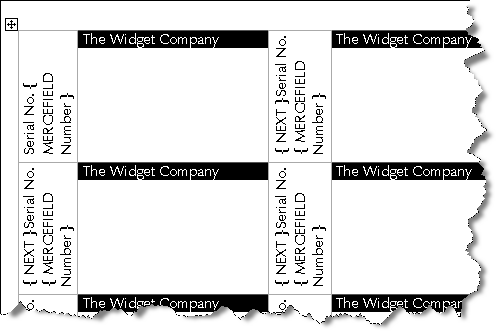
Select the fixed text and copy to the clipboard (CTRL+C). Then select the empty columns and paste the clipboard contents. This will fill each cell with a copy of the fixed text. It will also destroy any cell alignment that was originally present.
Apply any paragraph formatting you wish to the fixed text, then merge to a new document:
It would not be too difficult to adapt the same technique to display the serial number on the right of the label, or to have the serial number as the horizontal text with the fixed text rotated instead.
- Download the add-in
Numbered labels
It is a frequent requirement to produce labels bearing incrementing numbers. This page demonstrates some methods of achieving this.
See also Numbered Labels