Graham Mayor
... helping to ease the lives of Microsoft Word users.
 |
 |
 |
Many people access the material from this web site daily. Most just take what they want and run. That's OK, provided they are not selling on the material as their own; however if your productivity gains from the material you have used, a donation from the money you have saved would help to ensure the continued availability of this resource. Click the appropriate button above to access PayPal.
Making graphics in a VBA userform behave as radio buttons.
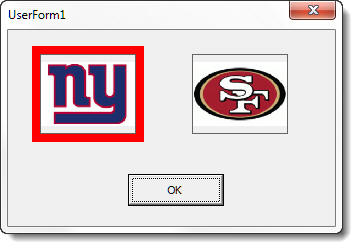
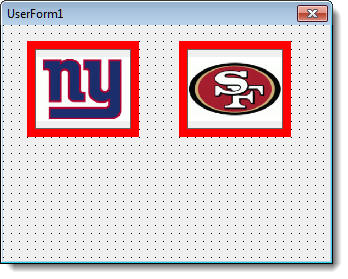
A user of the Microsoft Office Answers forums asked how to employ graphics in a userform as radio buttons, i.e. to use the graphic to make a unique selection from a number of similar graphics and provide user feedback of which was selected. While you can add images to radio buttons, the effect is disappointing and you have no control over the position of the button as shown in the first illustration below. With a little lateral thinking, it is possible to come up with something rather more elegant, as shown in the second illustration below.
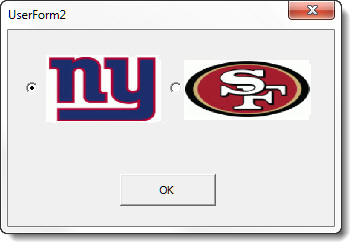
I have shown only 2 'buttons', but it would be easy enough to expand the concept to include any number of buttons that will fit on the userform.
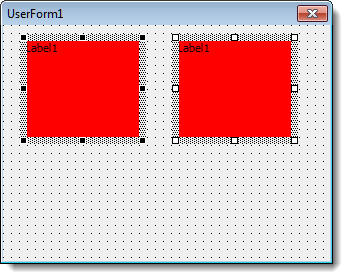
Start with a blank userform and add a label, then copy and paste that label to create the other buttons.
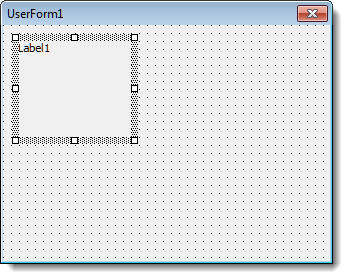
So that you can more easily see what you are doing, set the back colour of the labels to the colour that you will use to indicate that the button has been selected. I have used red.
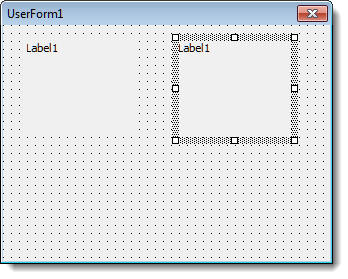
Then insert an image object into the first label as shown on the right below, and set the size to display a red border around the image. Repeat for second 'button'
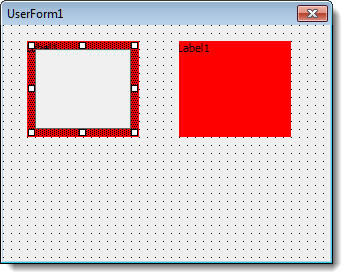
You could achieve some of this effect by adding a coloured border to the image, without using the labels, but you have no control of the border width.
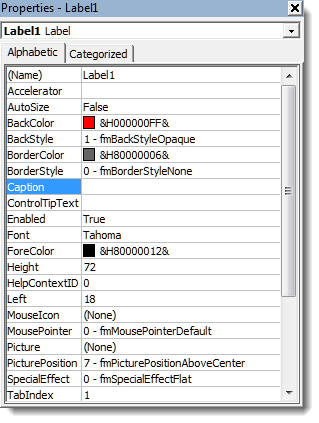
The next steps are to remove the label captions and to set the sizemode property of the image boxes
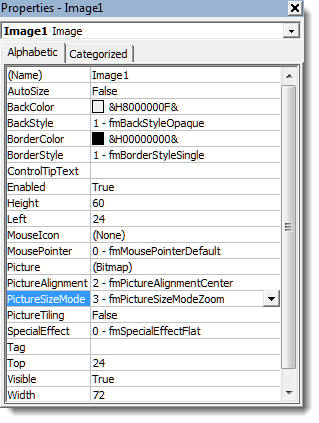
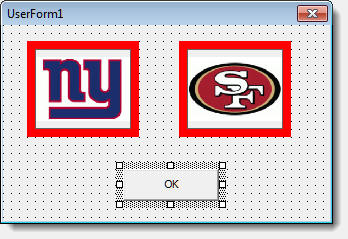
You can then insert the images, add a command button, and finalise the size of the userform. If you wish you can change the captions on the userform and on the command button directly as for the labels shown above, or you can do it in code as shown below.
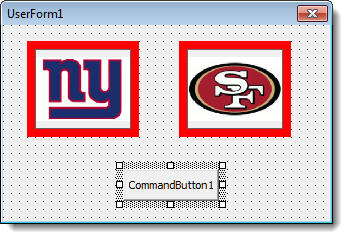
All that remains is to apply the macro code to the form. For the sake of this exercise I have left all the elements of the form with their default names. In practice, it is better to give them more meaningful names.
Private Sub CommandButton1_Click()
'The action when the button is clicked
Select Case Me.Tag
Case 1: MsgBox "Giants selected"
Case 2: MsgBox "49ers Selected"
'etc
End Select
Unload Me
End Sub
Private Sub Image1_Click()
Me.Tag = 1
Me.Label1.BackColor = wdColorRed
Me.Label2.BackColor = &H8000000F
'etc
MsgBox "Giants selected" 'The action when the image is clicked
End Sub
Private Sub Image2_Click()
Me.Tag = 2
Me.Label1.BackColor = &H8000000F
Me.Label2.BackColor = wdColorRed
'etc
MsgBox "49ers Selected" 'The action when the image is clicked
End Sub
Private Sub UserForm_Initialize()
Me.Caption = "Which team?"
'Set the initial
colours to match the userform background
Me.Label1.BackColor = &H8000000F
Me.Label2.BackColor = &H8000000F
Me.Label1.Caption = ""
Me.Label2.Caption = ""
Me.CommandButton1.Caption = "OK"
End Sub